I had a free pattern from Lincraft for a bag using the yarn but decided to tweak it a
Front
Cast on 48 stitches. Knit in stocking stitch for 17 rows, then knit two rows of reverse stocking. Repeat these 19 rows, then knit 17 stitches of stocking stitch and cast off.
Back and flap
Cast on 48 stitches. Knit in stocking stitch for 17 rows, then knit two rows of reverse stocking. Repeat these 19 rows twice more. At this point you should have 3 reverse stocking stitch lines ending with the two reverse stocking rows and this back should be the same size as the front piece.
To make the top and flap continue knitting as follows:
Row 1: K2, purl to last 2, K2
Row 2: K all
These two rows repeated will make the front flap in stocking stitch with a garter stitch band on either side to stop curling. Continue for the size you wish for your flap (include an extra 8cm or so to the length to allow for the distance the flap covers to go from the top over to the front- the top bit in other words). When you nearly reach the size of the flap that you wish ending with a knit row (mine was 21 cm from the last reverse stocking rows), shape as follows for the final rows:
Row 1: K2, P2 tog, P to last 4, P2togtbl, K2
Row 2: Knit all
Row 3: K2, ssk, ssk, K to last 4, K2 tog, K2
Row 4: Repeat Row 3
Cast off
The garter stitch edging should help the material curl up at all, but you will still probably find you need to block the material to make it lie flat. In addition, you can line your bag including the flap to help it hold its shape- more on that in a future post.
Sides (make 2)
Cast on 12 stitches. Knit in stocking stitch until the length of the side is the length of the front MINUS half the width of the side. So if your front piece was 25 cm and your side was 8 cm wide like my test bag, you want to make your side 21 cm long.
NOTE- if you want to have a bag handle as part of the side, read the notes below first!
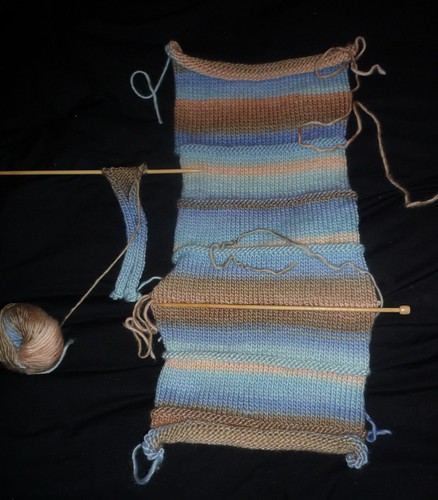
 |
| Checking the size of the bag side- this is about the right length. The knitting needle on the right shows the seam point for the bottom of the bag. |
Strap
Option 1- Garter stitch
There are several options for bag straps. Many knitted bags I've seen use garter stitch straps. On the plus side, these will match your bag exactly since they are, of course, made from the same material. On the minus side, they tend to stretch, particularly if you load up your bag the way that I do mine. If you go this option, make your strap shorter than you want it to be to take this stretch into account.
If you have more self control in bag packing than me, then you may wish to make the sides and the strap all in one piece. If so, just switch to garter stitch when one side is the required length, then stitch for the length of your strap (don't forget the stretch factor) before switching back to stocking for the other side.
Option 2- Icord or other cord options
Icord is another option (tons of tutorials out there online so I'll let you find one yourself). It can either be knitted on double pointed needles or using a Knitting Nancy (anyone else have one as a kid? I had two, one of which was my mothers from when she was a kid!). A similar sort of cord can be made using a lucet which is a bit like a primitive ancestor of a Knitting Nancy. Yonks ago I wrote a review of a lucet... I must dig it out and post it here
Option 3- Something else
The final option is to use some other material entirely for the bag strap. Since there is quite a lot in the world that is is 'something else' I shall leave it to you to investigate this option
Assembly
Smart people block pieces before sewing them up. Thanks to a combination of impatience and absent-mindedness I didn't do this, so please forgive the curly nature of the pieces in the photos below.
Sew the bottom of the front and back piece together (while you could choose to knit this as one piece, using a seam should make the bottom stronger and avoid sagging when loaded up with stuff).
 |
| Bottom and top sewn together and the first side in progress (the knitting needle shows the location of the bottom seam) |
 |
| Sew the bottom of the side pieces on first, centred over the bottom seam |


Next step is to attach the strap to the bag. I am using some large rings I bought from the craft shop. These will be sewn to the top of each side piece and the strap will then be attached to the rings. If you want a simple bag, you can do this step now, add your strap and call it good.
However, I am going to do something sneaky. I am making a fitted organiser to go with this bag. It will have pockets to hold things that otherwise disappear such as my mobile phone, and will also sneakily attach to the rings to prevent the bag from sagging out of shape too much. Because of this, I am going to leave the rings for another post. Trust me, it will make more sense in the end.
Click here to go straight to part 2


