Sunday 13 August 2017

Card making again

I've had a pile of new craft goodies for cardmaking but no time to enjoy them.  I decided to do something about that today and had a bit of a cardmaking binge.  Mind you, for me a binge is only four cards but that's a lot in one sitting for me since I always make it up as I go along.

So here is are the finished cards.
Memory box tree die with glitterflakes as the background

This is where I played with brushos for the background after embossing with white embossing powder.  The peacock was stamped with a Kalidescope ink pad and a bit of glimmer added to the tail with a wink of stella pen

I love Lawn Fawn stamps- I played with the 'Sending Hedgehugs' stamp set and tried my hand at masking to get him standing on the stump.  The leaves were made with glimmer flakes on sticky tape then die cut out
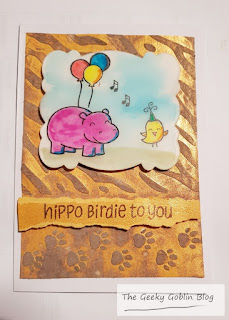
This is another Lawn Fawn stamp set with the background embosed from a folder I got in a magazine
I'm not a big card maker but it will hopefully work for a few upcoming birthdays!

Sunday 30 July 2017

The little travel scarf that wasn't

A few weeks ago I was set to go to the USA for the first time!  I had everything packed but for one thing- something to take in case I felt the urge to craft.  Particularly because it had to fly, it had to be small and lightweight so anything with lots of tools was right out.

I ended up deciding to find a knitting project and I went to the Bendigo Craft Alive with that in mind.  I bought several balls of lovely wool (Erm, I think several equals 6-7... oops) and thought that a nice lacy scarf of a lovely fluffy wool could be good.  I grabbed a nice rainbow yarn 'Damasco' by Bella Storia and cast on a few days before I was due to go to get it going. It was very simple- K1, yo, K2 tog.  Start with an odd number of stitches and you can make it as wide or as long as you like.  Perfect for fluffy yarns as the fluff fills in the holes a bit and it feels squooshy once made up.

Erm, well I finished it before I was due to fly out.  Ooops.  I only just got the fringe on though so here is my little travel scarf that didn't.
The irony is that I didn't need the replacement project either- I didn't end up touching it the entire trip!  Still, if I didn't have it then I would've really wanted to do something but not be able to!

Saturday 24 June 2017

Degardening

What is degardening?  It's what you do when you remove sad features from past gardeners that are making the whole thing worse.  Here's my before for my back garden fence.

Pretty, isn't it?  Oh wait, no it isn't.  The good news is that fixing this was a simple job for the electric screwdriver (cos I'm lazy).

Oh and trying not to step on/ cut when cutting up the branches for the bin/ squash with the fence a certain ginger cat...


But here's the job un-done!

The dead leaves that were caught in it have marked the fence a bit but that should was off with a bit of rain.

So not a big project but perhaps inspiration for you to get a little but annoying thing out of your life!

Saturday 10 June 2017

Lazy sewing mounting

If you do a lot of crafts, you often have little projects that you did fairly quickly.  Whether it is cross stitch or embroidery or some sort of cool hybrid project, the work is finished but what to do with it?

Now the 'proper' way is to sew it to some sort of base or mount.  This often requires first hemming the edge to ensure it doesn't fray under tension.  Or if it is little enough to be a bookmark you could use hemming table to stick it to a base bit of felt.

But what if it isn't bookmark material or you want to put it up on a wall or in a frame?  Or you are like me and are too lazy to do the 'proper' way for something that is little? (I'm better on big stuff that takes years!).

So I have this little embroidery that needs to be mounted lest the fabric be wrinkly.

The first step is to sort the edges of the fabric out so they don't move or fray- particularly since this is two pieces of fabric with wadding in the middle.  So I got my sewing machine out and- just kidding.  This is a lazy job. Masking tape to the rescue!


Now for the board to mount the fabric on. Lots of two dollar/cheap shops now sell craft supplies and painting supplies and they carry canvas boards in a wide range of sizes from the very small (what I need) to very large (useful source if you want thick, non-bendy card for a project).  Even better, the shop near me had 50% off.  Score!

Your board should be at least 2cm smaller around for each edge to be able to fold the material over easily for taping.

Fold and tape over top and bottom.
Then the two sides.

If you are happy with things at this point, leave it be.  I found the edges were showing so I very carefully cut off the excess using scissors.  Don't cut too close to the front of the piece or the fabric will possibly fray on the front.
+
Then apply tape to protect the fabric and to stop anything pulling away.

And here's my finished piece.  It looks so much better than it did at the start!

Now I will say that this is strictly for small, minor projects.  I don't know how well it will hold up over years, nor do I know that the tape will or won't do anything to the material for a while.  A little project like this that only took a day or so (well I did it over a few weeks but that's because I don't get to craft as much as I'd like) is possibly going to end up as part of a card or just stuck in a corner, it's not exactly heirloom work!  If you have spent months or years on a project, it's worth spending the time and/or money to do or to get someone to do things right.

Hope this helps you do something with the pile of finished work- enjoy!

Saturday 27 May 2017

Cardmaking

These cards were all made back in April but since the people they are for may see them on this blog (well Mum will, anyway), I've deferred posting them until now.

First up, a birthday card for my Dad.  No plan on this one other than wanting to play with some bright colours and to try using some hexagon dies (sizzix) because I'd not used them before.


Next up are my two attempts at waterfall cards.  I've never played with moving cards before but flipping through a magazine it looked cool so I gave it a whirl.

First up has a nature feel. The idea is that you are looking further down as you pull the tab.


The other one was to use some new stamps I got- one set was dragons and the other was a cute little unicorn (but I totally was reasonable as I only bought those and not the other set that contained four other unicorns- see?)
Ahem.  Anyway, so while I am not totally happy with the end results (my clouds and were hand cut and look a little dodgy) it's a cute idea.

Inside is a stamped message that says 'you're more awesome than unicorns and rainbows'.  This one may end up being a birthday card for my niece.  We'll see.

Thanks for reading!

Saturday 13 May 2017

This is a little one but I actually got a 'little job' done.  I had a lace curtain in my bedroom that was way too long.  For several months I tried to pretend that it was OK because it was artistically draped but the reality of a little kitten meant I had to do something.

This is the point I would show you the before photo. 'Aha' I thought.  I don't need to worry as I can use that photo from when I first painted.  Trouble is, it turns out that photo was prior to me getting the curtain.  So the short version is, I don't have a before.  But I did cut off over 20 cm of material and the amount of material folded over for the new pocket was... hmm, 5+5 for the pocket, 1.5+1.5 for the bit at the top plus another 1cm for the folded mock french seam... 14cm?  ish?

Anyway, there was a lot of excess.  Got that mental picture in your head?

OK.  So here's the after.  I was quietly astonished that it is A) straight and B) not a teeeeennyy bit too long or short in a Murphy's law kind of way.  Woohoo!
It wasn't terribly high tech.  Basically I first measured to see what length I wanted (197 cm).  Then I laid it out in the most open area I had (dinning room floor).   Then I did the above again AFTER the cat didn't think this was the best new toy ever *sigh*
Using pins, I added a pin to mark the bottom of the pocket, top of the pocket (5cm), 1.5 for the top bit x2 (as it will be folded over here), 5cm for the other side of the pocket and 1cm to fold over for the seam.  That was the point that I then very very carefully cut so it wasn't wonky.

After that, I pressed the folds before sewing (very low heat, no steam as I think it was synthetic material).  That made the sewing SO much easier.  Fold the 1cm edge over first (this hides it in the pocket and makes a nice finish) and press.  Then I used the nice ironed line to measure the other fold line- 6.5 cm from the new fold to the old, pin in place then press.

Finally, sew the two seams- I used a zig zag stitch as my two second google research says that's best for lace/shear fabric.  One just above the bottom fold first (the bottom of the pocket) then the other at the top pocket line.  Not having a cat jump on the material can be helpful in this case, as can that cat not deciding that it was time for cuddles...

And of course don't get me started about putting the curtain up and the joy of a certain four legged, fur covered creature deciding to play with the big pile of lace again...  Sill, he's cute so he's easily forgiven.

Saturday 6 May 2017

Interchangeable patches

This is not a full project but more of an idea that you can implement into a project.  A few posts ago I showed off my little embroidery that came with a cute bag kit.
It's OK but it's not 100% my style although the bag is cute.  Now I could make the bag without the embroidery or I could put it on anyway and deal but then I got thinking.  What if I could do both?

This is a bit of a 'make it up as you go along' job with the odd ebay purchase to help.  The first step was from the kit- make up the backing border.  This is pretty basic- two pieces of fabric cut to size (allowing for seam allowances) and then sew around the edges, right sides facing.  Then cut a hole in one side to allow you to turn it inside out to make a little pocket thing (this hole is going to be the back when it's attached to the bag).
This is the point where things take a turn.  Jumping on ebay, I found some very thin little powerful magnets- you can see one of them in the photo above.  They are about 1 mm thick but are strong enough to stick to a metal washer through a layer of material (I checked before sewing them in).

Handsew these into place inside the fabric pocket onto the BACK piece of material.  That way the front stays nice and plain.
This is the BACK view of the pocket- you can tell by the rough slit to gain access and the stitch marks holding those magnets into place
Then all you need to do is sew some metal washers onto the back of whatever pieces you want to add to the patch.
Not the most pretty sewing job but shhh, no one else is going to see this bit!
Put the top patch in place and the magnets will hold it in place nicely
With four magnets (plus I bought an extra just in case that I've just stuck in the pocket with the others to add a bit of oomph) it's more than enough to hold the patch in place- holding it up and giving a good shake doesn't move it so it should?  be enough to keep things in place.  At least for something with low interaction- it probably will not work as well as is on a piece of clothing that rubs and catches on other things.  You could boost the strength in the attachments if you used more magnets instead of washers to the embroidery- just make sure you don't sew the magnets the wrong way so they repel rather than attract!

Feel free to leave a comment if you try it!  I realise that I could also have used velcro, but this way you don't see anything if the embroidery isn't put into place.  Plus maaagneeets...

Sunday 16 April 2017

More embroidery...

I seem to duck into different crafts in phases- one big or several small projects in one craft until I get tired of it then off to find a new exciting project.  What, me get distracted?  Oooh, kitty!
Meet George, my new kitty
Ahem.  So as I was saying, I've finished another embroidery- just started it because I was in the mood to do something small, easy to do on the couch and pretty.
The trouble was that crease above the trees.  That's AFTER washing and ironing it with steam.  Grrr.

So I hit google for ideas.  The easiest fix I found with stuff I had was to put some vinegar onto the crease as the acid would help loosen the fibres to iron the crease out.  Then wash it in water to remove the vinegar.  Here's the finished result after ironing and letting it dry
It hasn't completely removed it but it is well and truely in the background now, particularly with the 'bumpy threads' nature of the fabric itself.  I'd call it plausible (sorry, I've been watching a lot of Mythbusters on the break!)

And bonus round, here's a sweet little shadow work embroidery I did (see the theme conversation at the start of this post!)


Thursday 6 April 2017

Bunny bags

This is not the most high tech project but it is fun and good to do with the kids (or for the kids as it is in my case).  If you've not been in the shops since Jan 1 when the hot cross buns hit the shelves, Easter is coming.   I have three nibblings (my favourite word discovery recently- the plural of both nieces and nephews) and of course as a doting aunt, I have to get them chocolate.  But there is a bit of a mix of things to give (in part because one needs dairy free chocolate so that has to be different from the other two).  So I needed bags.

However, when I went to the shops, 'Easter bags' were starting from $2 each which seems silly for a bag you can't reuse for the next birthday/Christmas/present giving occasion the way that normal gift bags can.  But plain brown paper bags were only $2 for three.

So I was at home looking at my boring brown bags and decided to try and smarten them up.  Step one, cut out three pairs of ears from white paper and pink paper.  Nothing fancy, but I was sneaky and doubled over the paper prior to cutting so the rough, uneven ear would match the other.  Glue the parts together.

Next step, the tail.  I don't have a pompom stash at home so if you do, you could miss this step if you liked.  I tried two methods- using two discs of card with a slit cut through it to wrap wool around or wrap wool around the four fingers of the other hand (there are tons of pictures and explainations on how to do this on google).  The finger method was far faster than the card method, although the pompom was much neater than using the card method.
Both methods are much easier without certain assistance from George...

Finally glue the ears on the inside of the front of the bag and glue the pompom tail to the back (craft glue was good for this) and let dry.

Have fun and happy Easter!  And if you are one of my nibblings, no you can't find out what is inside until Easter.  Assuming the bunny inside doesn't eat it before then...

Monday 3 April 2017

I've said it before, kits are good holiday go tos

Labour day was a little while ago but since I've not gotten around to photographing this until now, here's a new post!  This is part of a cute little bag kit I bought from a patchwork and quilting shop in NSW a few years ago on my travels and it was perfect to throw in a bag and take camping.

I tweaked the pattern a little- I added boards to the boat (it was just an outline originally) and changed the colours of the fish because I preferred the green and yellow.  The boards are a little wonky and uneven but I choose to call it quaint and rustic instead of 'wobbly because you really should've drawn it on before you started'.  The important thing for any project is to know how justify... innovative differences caused through inattention...

Sunday 19 February 2017

Really finished crochet bag

I went to see when I posted the finished crochet for a small bag and was slightly shocked that it was way back in 2014!  At the time it was just the outside, but since it had no lining it wasn't terribly usable.

Well I finally sat down with some fabric and tried to fix it.  I used some light blue/purple silk I picked up at a craft show years ago for the inside and some cream cotton for the outside and lining of the pocket.  It took a bit of puzzling and 'um, if I want the seam there to be inside but that seam to be opposite... ?' but I got there in the end.  Even got the pocket in properly and sewn in such that it is big but not going to lose things in the lining.

Sewing on a few small D rings and adding a chain (as I couldn't find something that would work for a strap and internet says that metal chain handles are in anyway) and it's finished.  There are a few little things that I can see that I did wrong but since I'm not an expert sewer or designer, I can live with them.  I might throw a few hidden stitches in to hold the crochet in place a little better but I suspect that it's one of those things that only I see.


Sunday 8 January 2017

House update

And here is the finished result of the bedroom.  The walls are a white now rather than cream except the feature wall that is 'canoe blue'.  Ignore the cable in the bottom left- it goes to the fan that is only temporary but essential (it only got to 30C minimum last night so the fan is a necessity!).

The heat also puts the breaks on more DIY so I'm back to arranging the house etc.